
Create a Server
STOP! You can only create a server on your own if you've been given special access by me (Max). Everyone is always allowed to ask me to create a server for them, but only those with special access can create them on their own and use the instructions on this page. If you have no been given access then these instructions will not work!
Creating a server on HumbleHub is a fairly quick process, but there are many settings and menus that you will need to go through before the server can be created. This page will guide you through these menus and help you get your server up and running.
Step 1: Open Admin Page
Click your user's avatar at the top-right of the page, then click Admin from the dropdown menu.
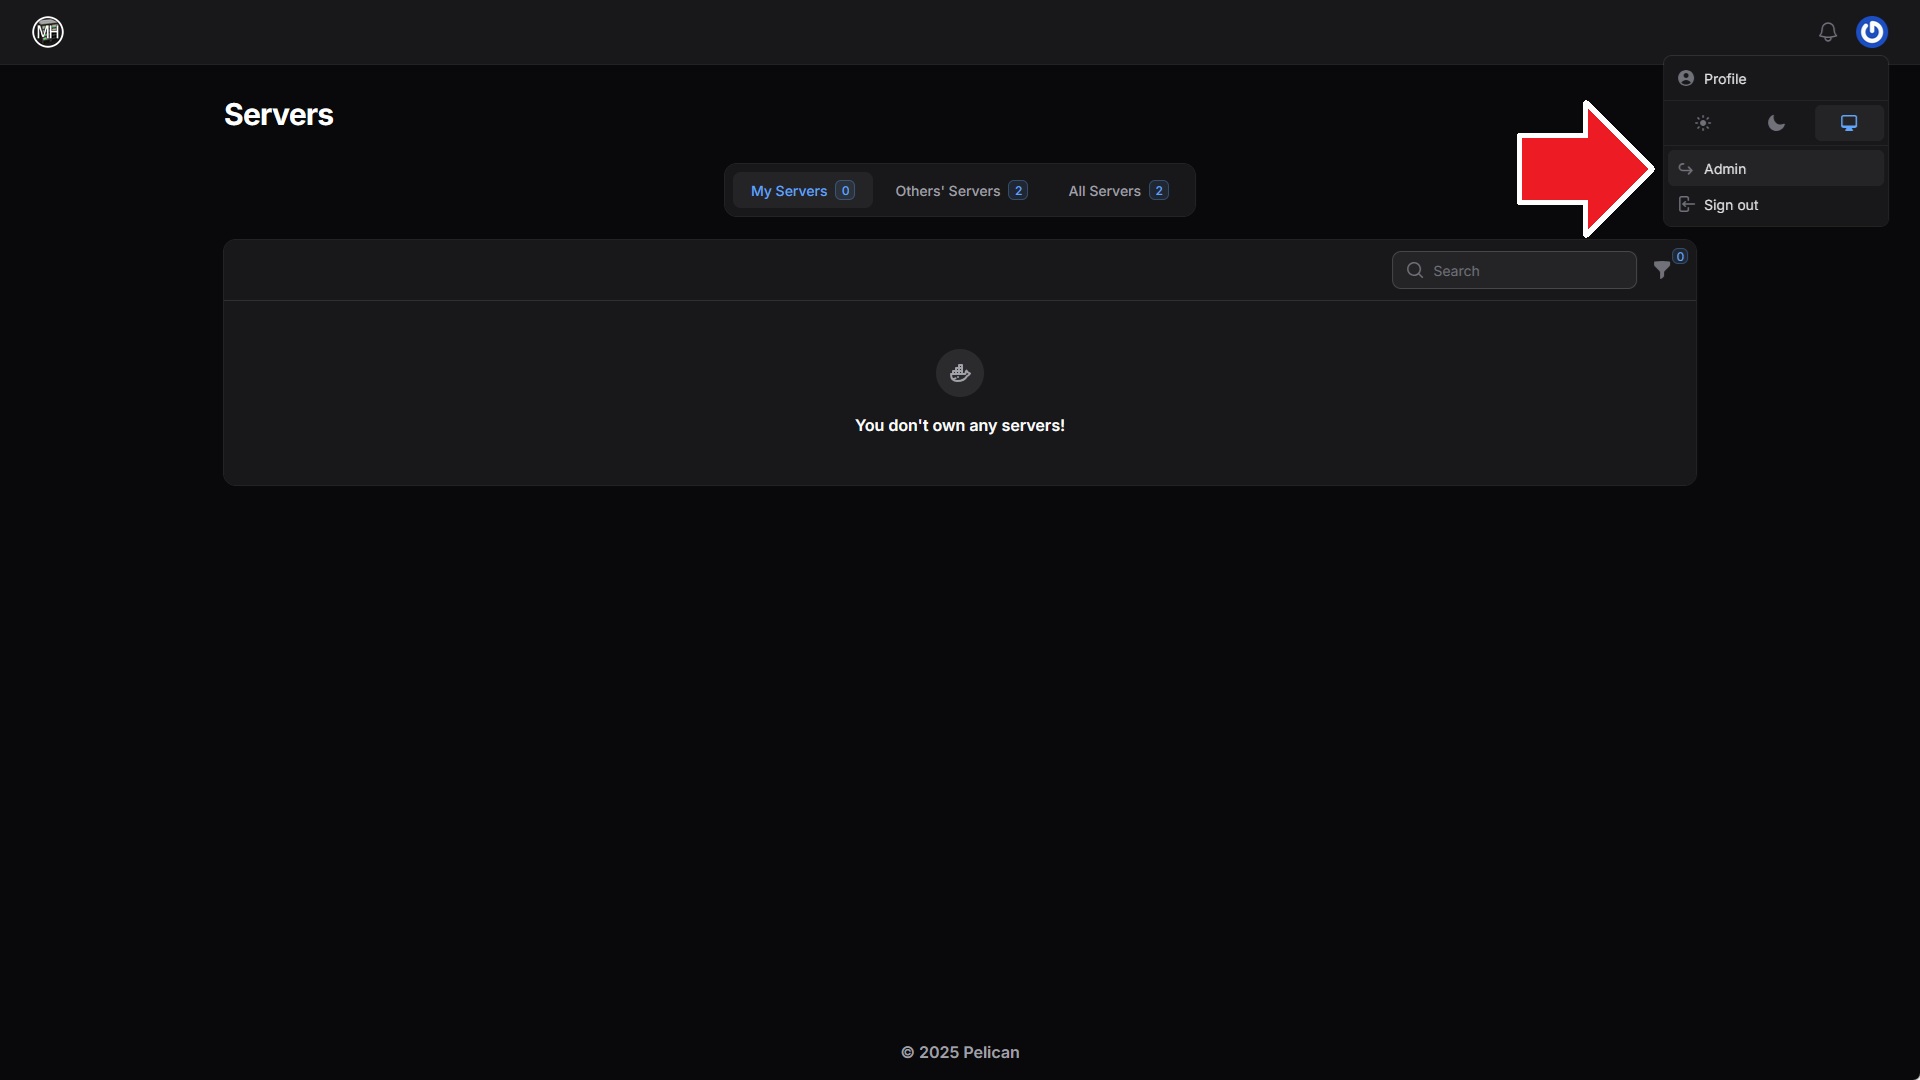
Step 2: Switch to Servers Tab
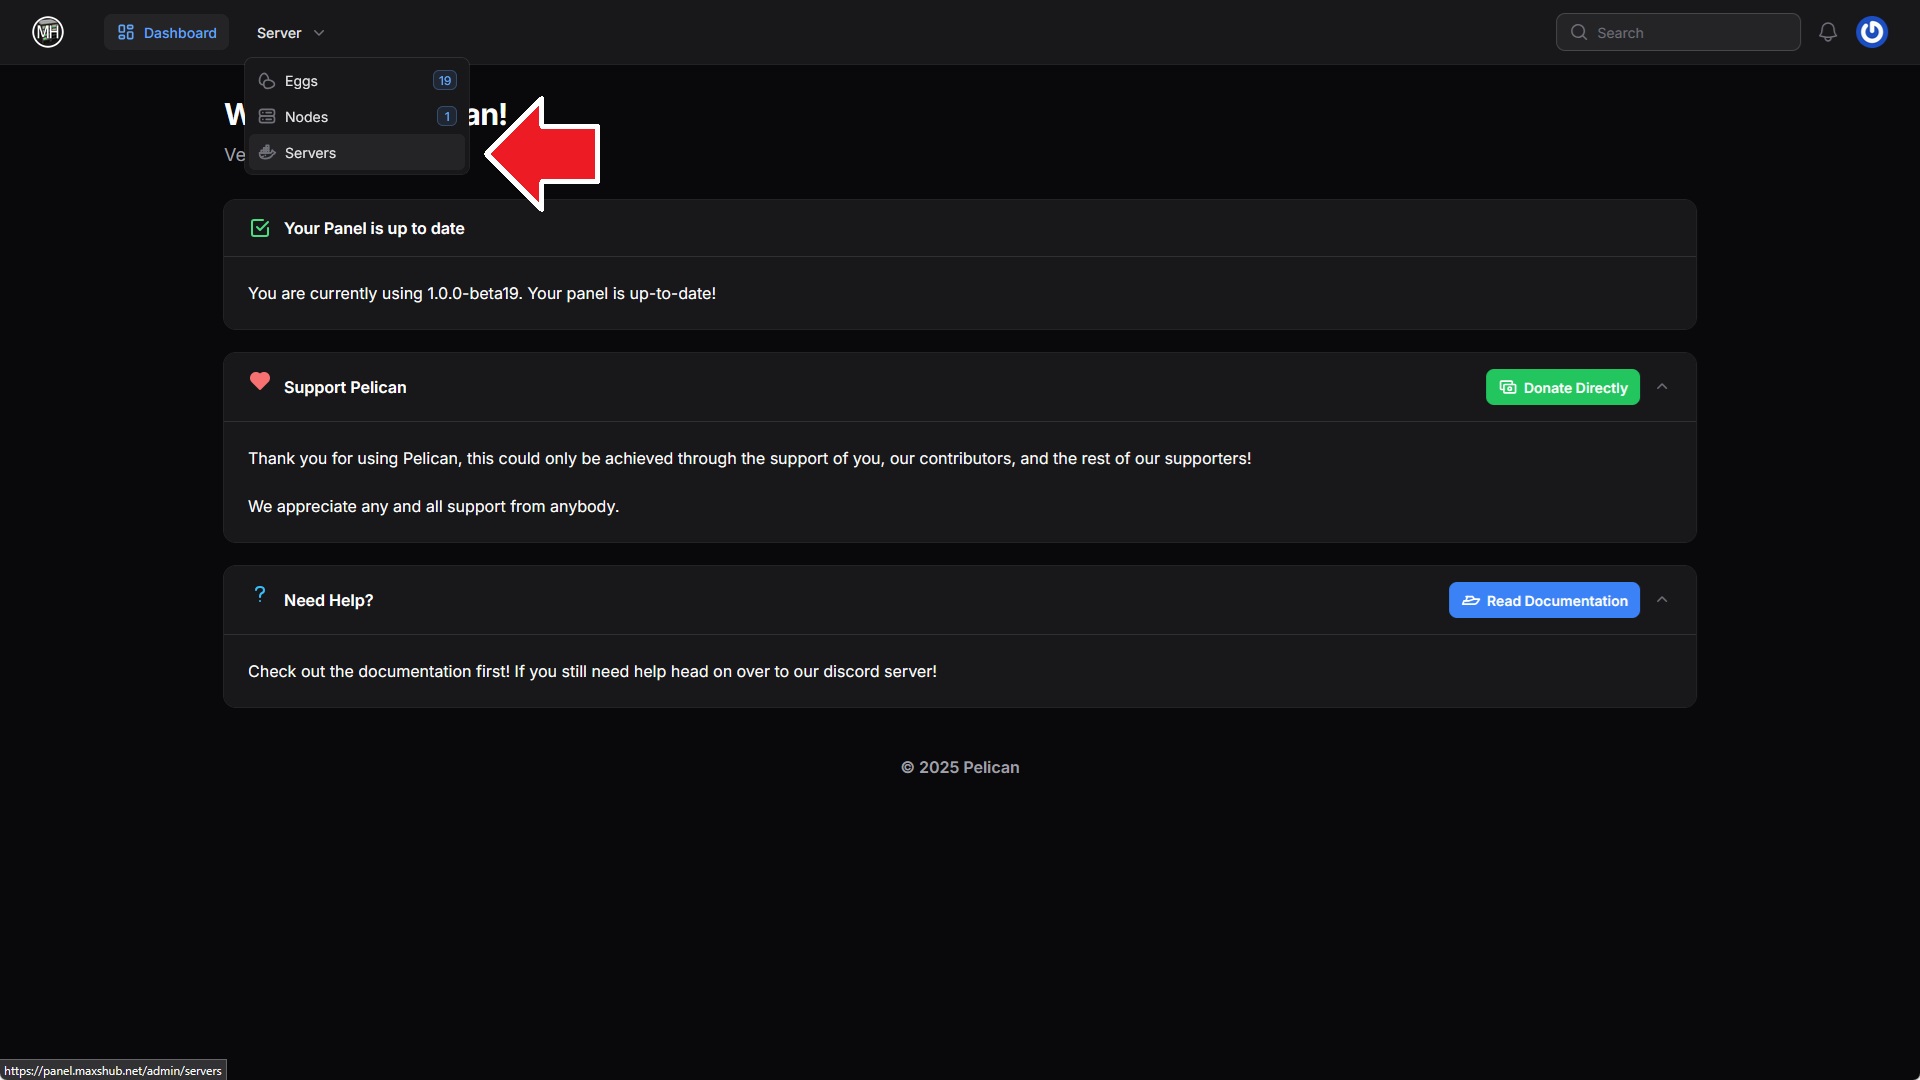
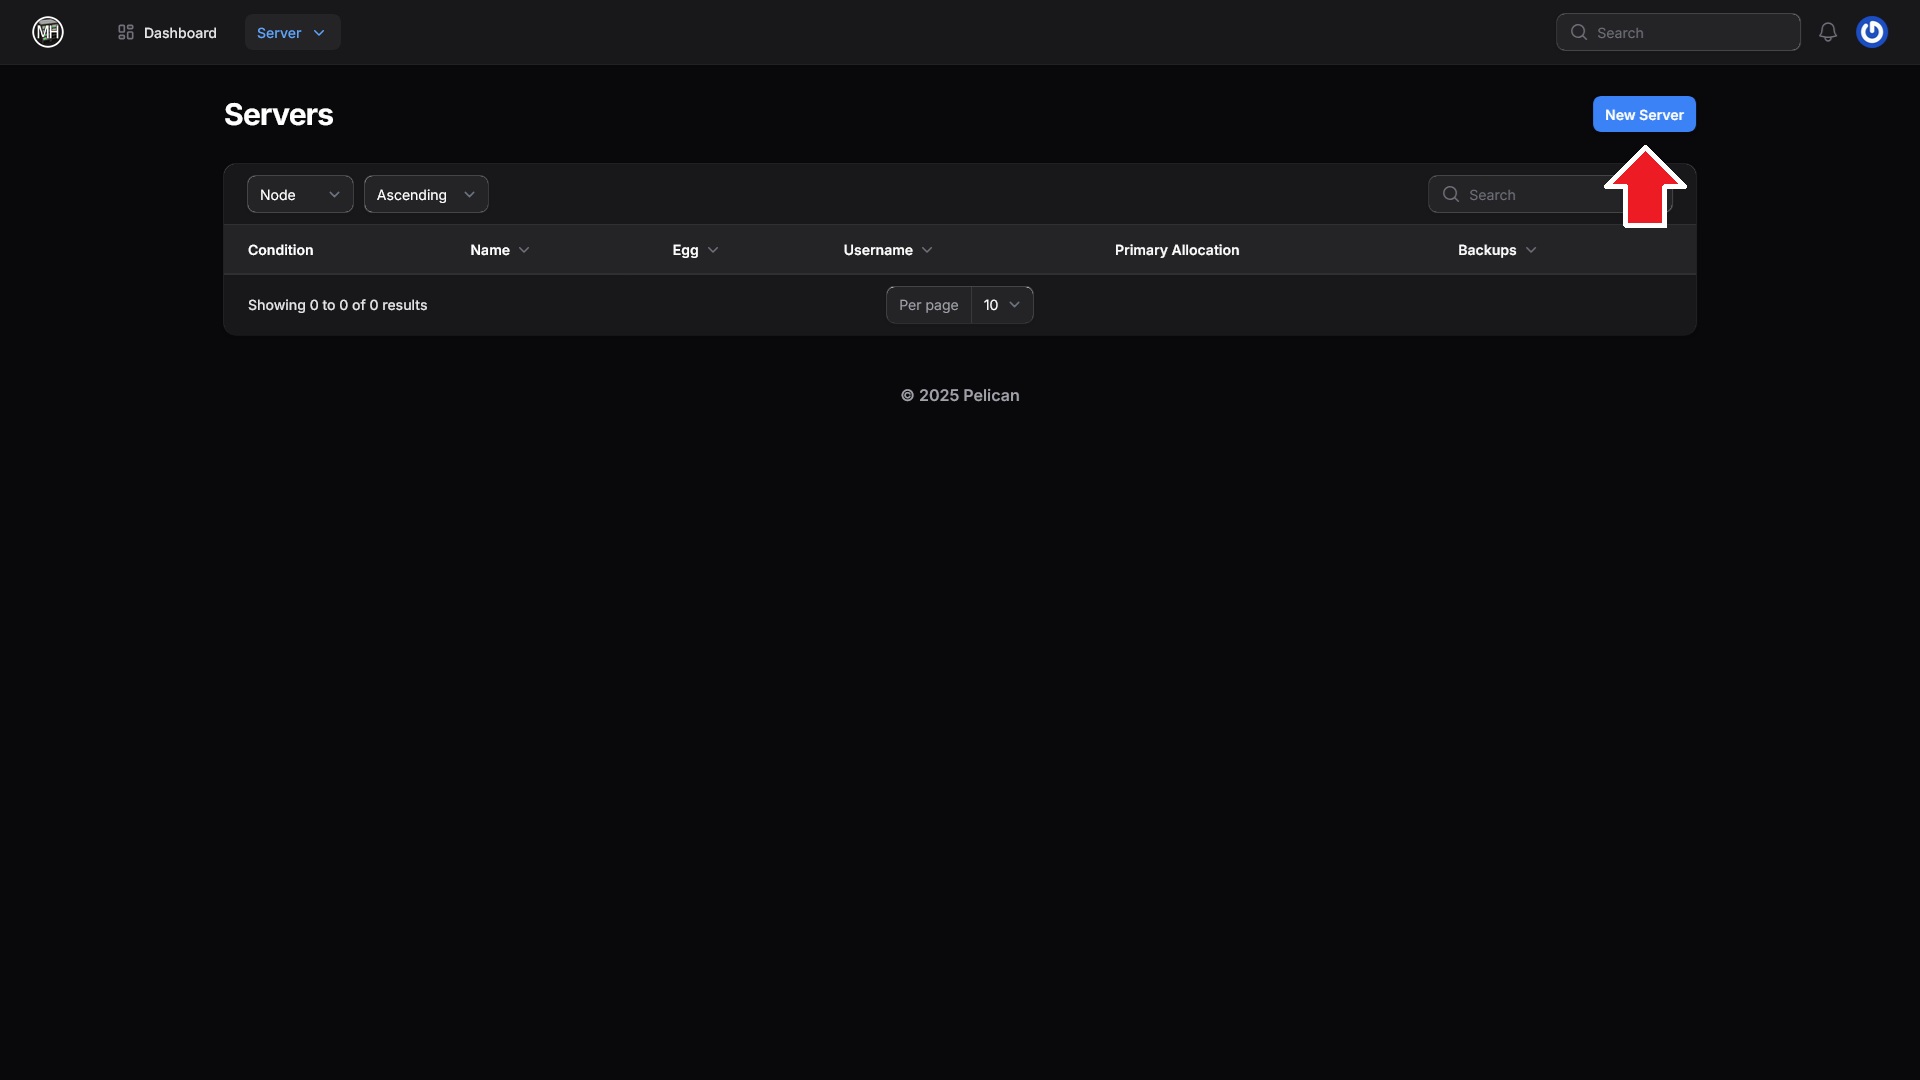
Step 3: Click New Server
On the Servers page, there should be a blue New Server button near the top-right. Click this button.
Step 4: Configure Basic Server Details
Name - Give your server a name. This name will be displayed on HumbleHub so that you can identify this server. This does not set the in-game name of your server. Please note that other users with server-creation access will be able to see this name.
Node - This setting determines which physical server your server will run on. You must select the Public Wing node.
Primary Allocation - For the Primary Allocation option, simply click where it says "Select Allocation," then click any available IP and port combination to assign it to your server. Do not click the plus (+) icon. The primary allocation determines how people will connect to your server. It will be the IP and port combination that you will use to connect. At this time, all servers will have the same IP address of 10.10.10.4, but each server will have a unique port number.
Additional Allocations - For now, you can leave this setting alone. Depending on what kind of server you are making, you may need to return to this option to add additional allocations. This will be explained later on in this page if its necessary for your server.
External ID & Owner - Please leave these settings to their default (no external ID and you are the owner). If you want to add additional users to your server so that they can manage it, you can do this after the server is created.
Step 5: Egg Configuration
Once you have finished configuring your server's basic information, click the blue Next Step button to proceed. We will now configure your server's game-specific settings. Choose your desired server type from the list below, and expand it to see additional steps.
For any server, two options will be present next to the Name drop-down: Run Install Script and Start After Install.
Leave Run Install Script set to its default of Yes. You may turn Start After Install off if you'd like, but leaving this to its default of Yes is generally recommended unless you know what you're doing.
Minecraft (Vanilla)
Minecraft (Vanilla) Configuration
For the Name option, select "Minecraft (Vanilla)". Two options will appear: Server Jar File and Server Version.
Server Jar File
This setting determines what the server's .jar file will be renamed to. Leave this set to its default of server.jar.
Server Version
This will determine which version of Minecraft your server will run. By default, this will be set to latest. You could put a specific Minecraft version here, such as 1.21.1 or 1.8.9.
Minecraft (Paper)
Minecraft (Paper) Configuration
For the Name option, select "Minecraft (Paper)". Four options will appear: Minecraft Version, Server Jar File, Download Path, and Build Number.
Minecraft Version
This will determine which version of Minecraft your server will run. By default, this will be set to latest. You could put a specific Minecraft version here, such as 1.21.1 or 1.8.9.
Server Jar File
This setting determines what the server's .jar file will be renamed to. Leave this set to its default of server.jar.
Download Path
This will specify a custom download URL for the Minecraft server's .jar file. Do not use this setting. The server will already be configured to download Paper from the official source.
Build Number
You can specify a specific Paper build number for the server to download and use. By default, it will use the latest build available for the Minecraft version specified in the Minecraft Version setting.
Minecraft (Forge)
Minecraft (Forge) Configuration
STOP! If you are trying to run a CurseForge modpack, you should use the Minecraft (CurseForge) configuration instead of this one. If you want to set up your own custom Forge server, then this configuration should be used.
For the Name option, select "Minecraft (Forge)". Four options will appear: Server Jar File, Minecraft Version, Build Type, and Forge Version.
Server Jar File
This setting determines what the server's .jar file will be renamed to. Leave this set to its default of server.jar.
Minecraft Version
This will determine which version of Minecraft your server will run. By default, this will be set to latest. You could put a specific Minecraft version here, such as 1.21.1 or 1.8.9.
Build Type
Forge highlights two different versions of itself for each Minecraft version. One of these versions is the latest version which simply means the most recent release. For Forge, however, the latest release isn't always the most stable, so another version is named the recommended release. This setting allows you to choose between the two for the Minecraft version you've selected. This setting is set to recommended by default and that is normally the best option.
Forge Version
If you know a specific Forge version that you'd like to use, you can specify the desired Forge version here. This setting overrides both the Minecraft Version and Build Type settings. The appropriate Minecraft version for the specified Forge version will be used.
Minecraft (NeoForge)
Minecraft (NeoForge) Configuration
For the Name option, select "Minecraft (NeoForge)". Two options will appear: Minecraft Version and NeoForge Version.
Minecraft Version
This will determine which version of Minecraft your server will run. By default, this will be set to latest. You could put a specific Minecraft version here, such as 1.21.1 or 1.8.9.
Forge Version
If you know a specific NeoForge version that you'd like to use, you can specify the desired Forge version here. This setting overrides the Minecraft Version setting. The appropriate Minecraft version for the specified NeoForge version will be used.
Minecraft (CurseForge)
Please read these instructions carefully. In order to use this server configuration, you will need to get a CurseForge API key.
Minecraft (CurseForge) Configuration
For the Name option, select "Minecraft (CurseForge)". Three options will appear: Modpack Project ID, Modpack File ID, and CurseForge API Key.
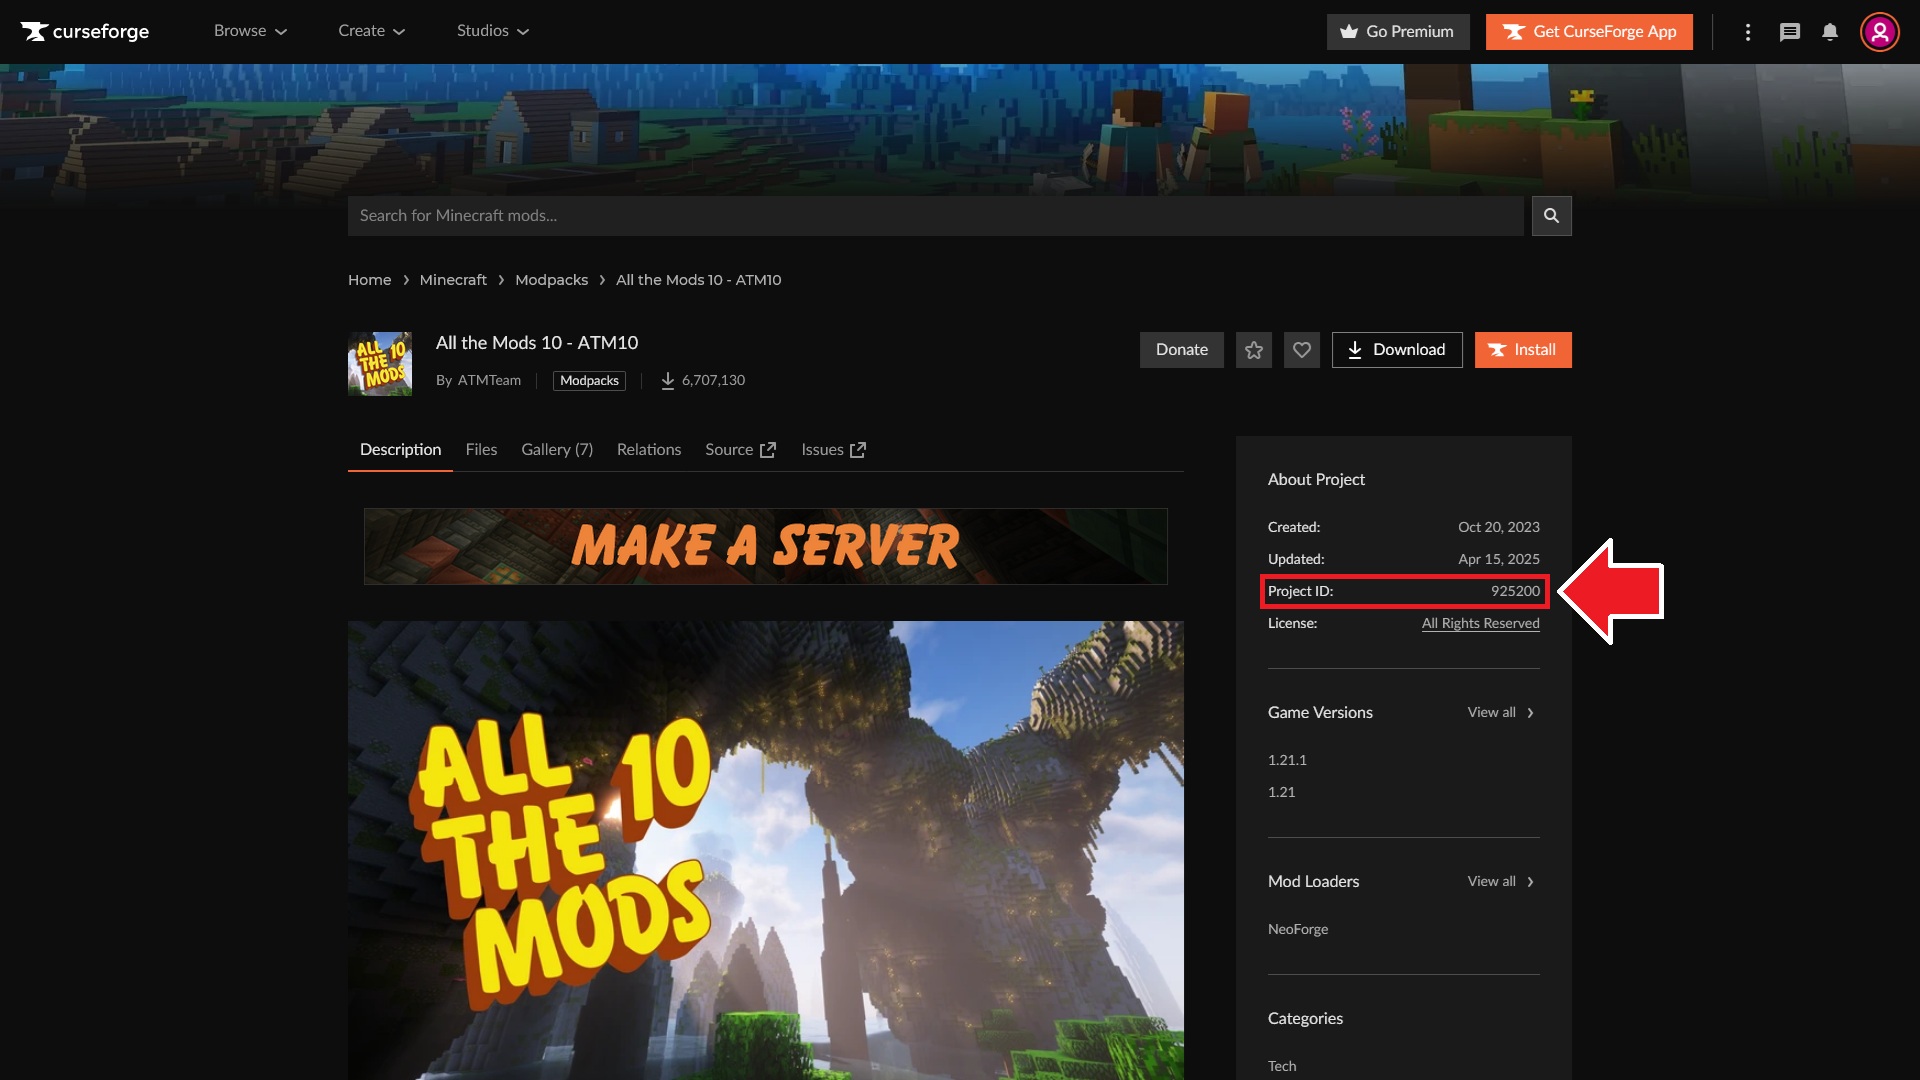
Modpack Project ID
When viewing a modpack on CurseForge, there will be a sidebar on the right side of the page titled About Project. Just below this, you should find the Project ID. It is normally a six or seven-digit number. Enter this number into the Modpack Project ID setting.
Modpack File ID
The File ID is a little trickier. Leaving this blank will attempt to download the latest modpack version's server pack. If a server pack isn't available for the latest version, it will download the latest client version instead. This may or may not be what you want. If you know what you're doing then you can leave the Modpack File ID blank, but I'd highly recommend you specify a specific File ID.
How to Find a CurseForge File ID
To find a File ID, you will need to go to the Files section of your modpack. Visit the modpack's page on CurseForge, then click the Files tab.
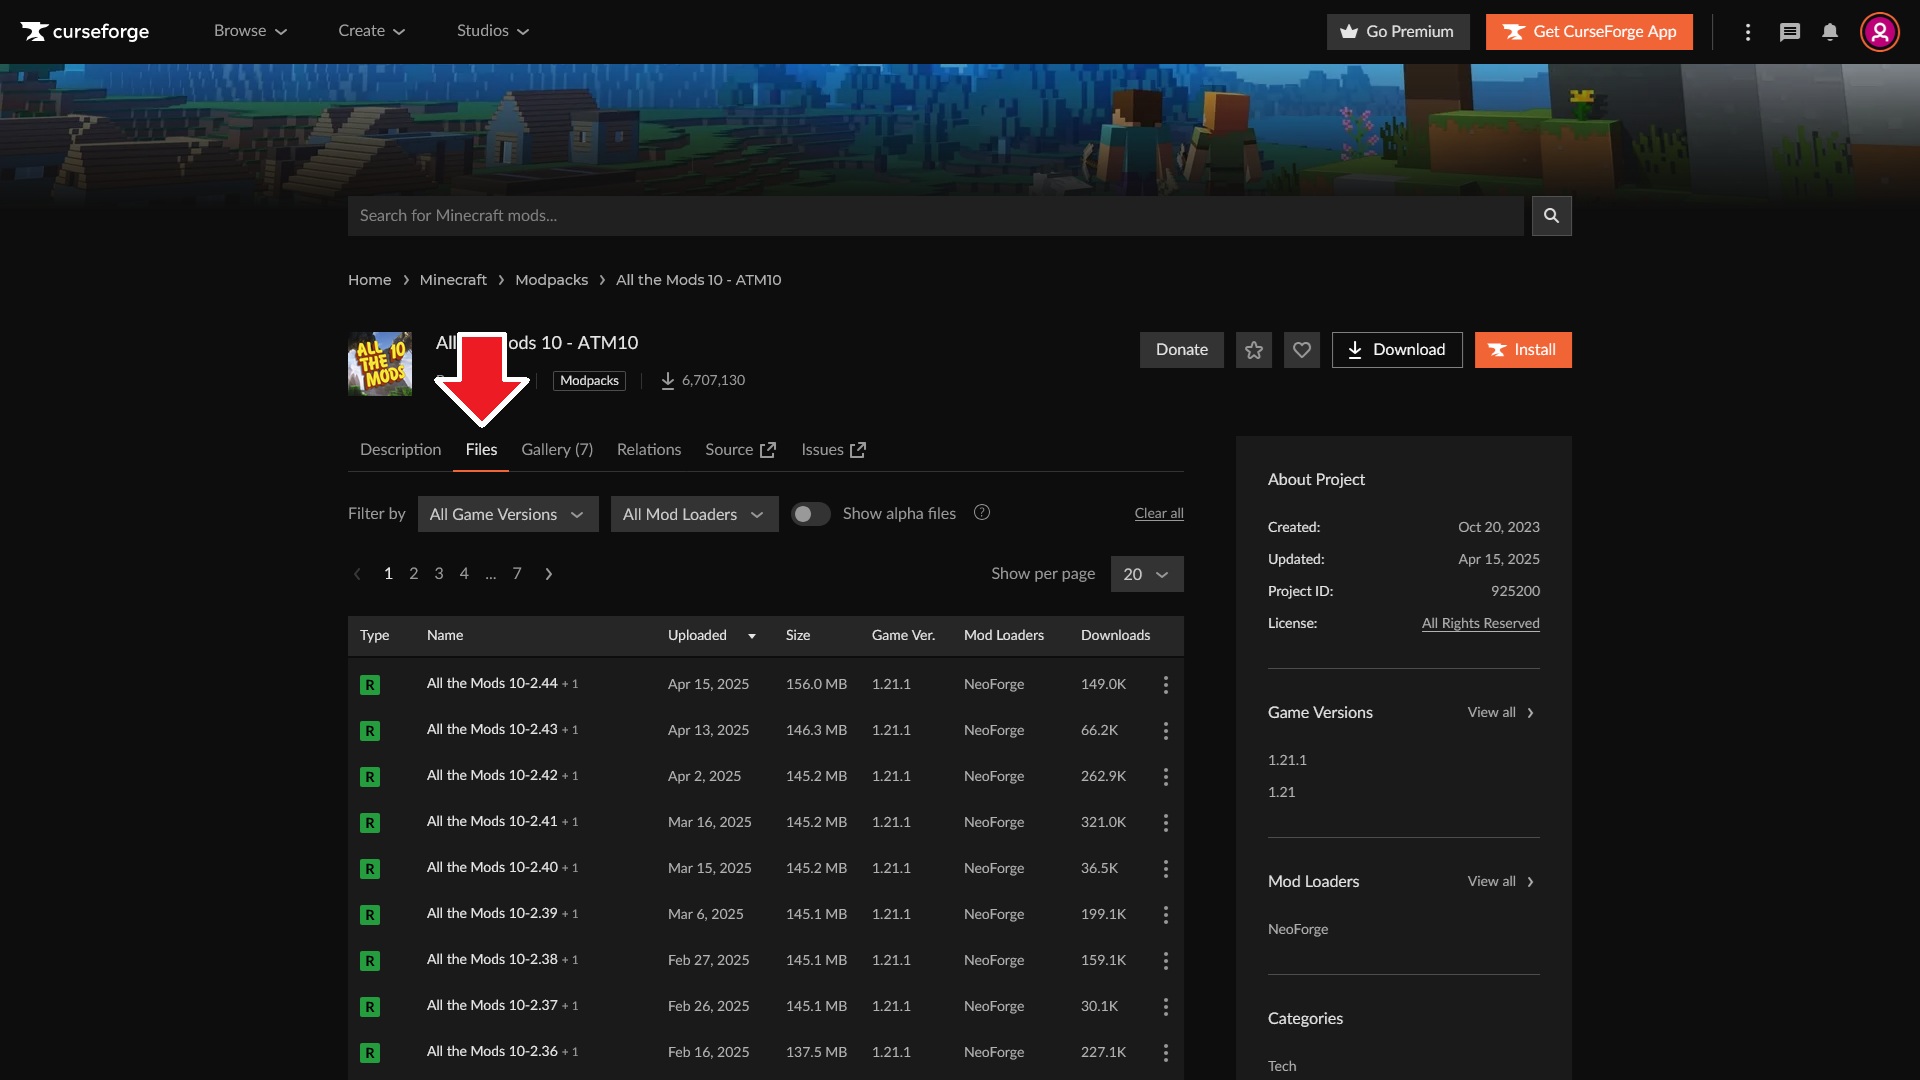
You will now see a list of files. Each entry is normally a different version of the modpack, and the list is sorted by the upload date, so the latest release should be the first entry. Notice how in the example above, each file's name has a little "+1" added to the end. This denotes that there is one additional file available for that version, and this is normally a server pack. Click the file/version of the modpack that you'd like to use and you'll see a screen similar to what is shown below.
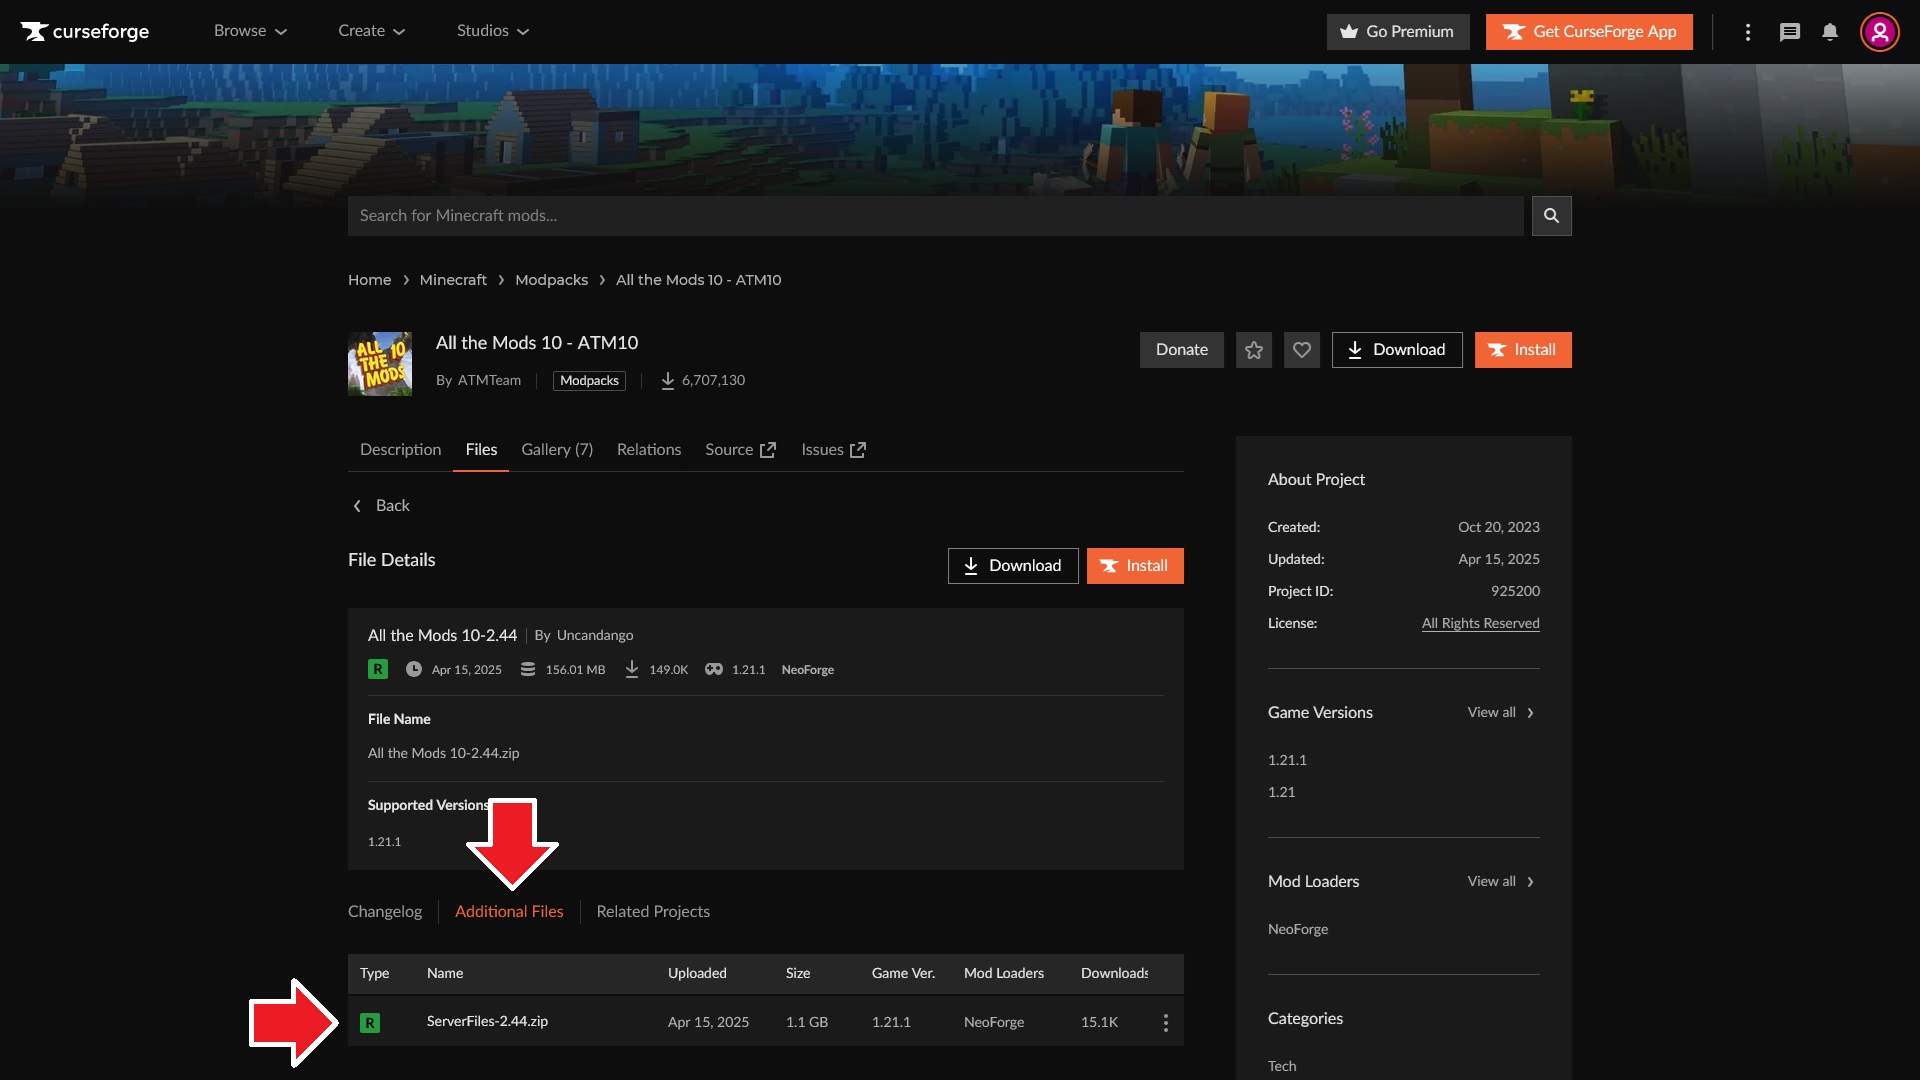
Below the File Details, there should be an Additional Files button. After clicking this, you will be able to see what the additional file is. Normally, it is a server version of the modpack. As you can see in the example above, it is clearly named "ServerFiles," so this is what we'd want for our server. To get the File ID of this server pack, you'll first need to click on the file. This will then reload the page to show you the server pack's file details. Now, look at the current URL in your browser. The end of the URL will have a number. That number is the File ID of the file you're viewing.
Example:
https://www.curseforge.com/minecraft/modpacks/all-the-mods-10/files/6427314
The file ID is 6427314.
CurseForge API Key
You will need an API key for CurseForge in order for your server to install the supplied modpack. It's very easy to get one and the two steps are detailed on this Help Center page.
Terraria (tModLoader)
Terraria (tModLoader) Configuration
For the Name option, select "tModLoader". Several options will appear.
tModLoader Version
The version of tModLoader that will be installed. You should not leave this set to latest and instead should specify the tModLoader version you are using, even if it is the latest version.
Server Password
Optional. If set, prompts players for a password before they can join.
World Name
This tells the server which world to load. By default, no world will exist and so it will create a world with the entered name.
World Size
(Only used during world creation) Defines the world size to use.
Difficulty
(Only used during world creation) Defines the world's difficulty.
Max Players
Defines the player limit for the server.
MOTD
A message that appears for each player in chat when they join.
Language
Sets the server's language.
GitHub User & GitHub OAuth Token
I have no fucking idea why it asks for these. You can leave these blank.
GS: GO / GMod / TF2 / Unturned
Steam Game Server Login Token
For some games that utilize Steam in some way, there will be an option to supply a token. This is normally called "Steam Account Token," "STEAM_ACC," or "GSLT." These tokens aren't technically necessary, though Unturned requires it to be present, but not supplying a valid GSLT will prevent your server from displaying on server lists and would only be accessible via a direct connection (manually entering IP and port instead of selecting from list of servers).
To generate a GSLT, visit this webpage on Steam.
After you've finished using the instructions above (if any) for your server, click the blue Next Step button.
Step 6: Environment Configuration
Resource Limits
STOP! Please read this entire section. You must set resource limits for your server using the guidelines below. Permissions can be be given upon request and on a per-server basis for exceeding these limits.
For CPU, Memory, and Disk Space, you must switch these from Unlimited to Limited. You can set these however you'd like, but please respect these limits:
- CPU Limit: ≤400%
- Memory Limit: ≤8192 MB (1024 MB = 1 GB)
- Disk Space Limit: ≤16000 MB (1000 MB = 1 GB)
If you believe your server requires more resources than what is allowed for above, please reach out to me (Max) first before exceeding these limits.
Advanced Limits
Do NOT change these from the following defaults. If your Advanced Limits settings do not match what is shown below, please change those settings so that they match.
- CPU Pinning: Disabled
- Swap Memory: Disabled
- OOM Killer: Disabled
Feature Limits
For Allocations, Databases, and Backups, please use the following settings. If you need more than what is allowed for below, please reach out to me (Max) first before exceeding these values.
- Allocations: 0
- Databases: 0
- Backups: ≤2
Docker Settings
Leave these settings to their defaults. The only instance where you may want to change these settings is if you are creating a Minecraft server and you are using an older Minecraft version that isn't compatible with newer versions of Java. In these cases, the Image Name setting should have a dropdown with various Java versions you can select to use.
Step 7: Create Your Server!
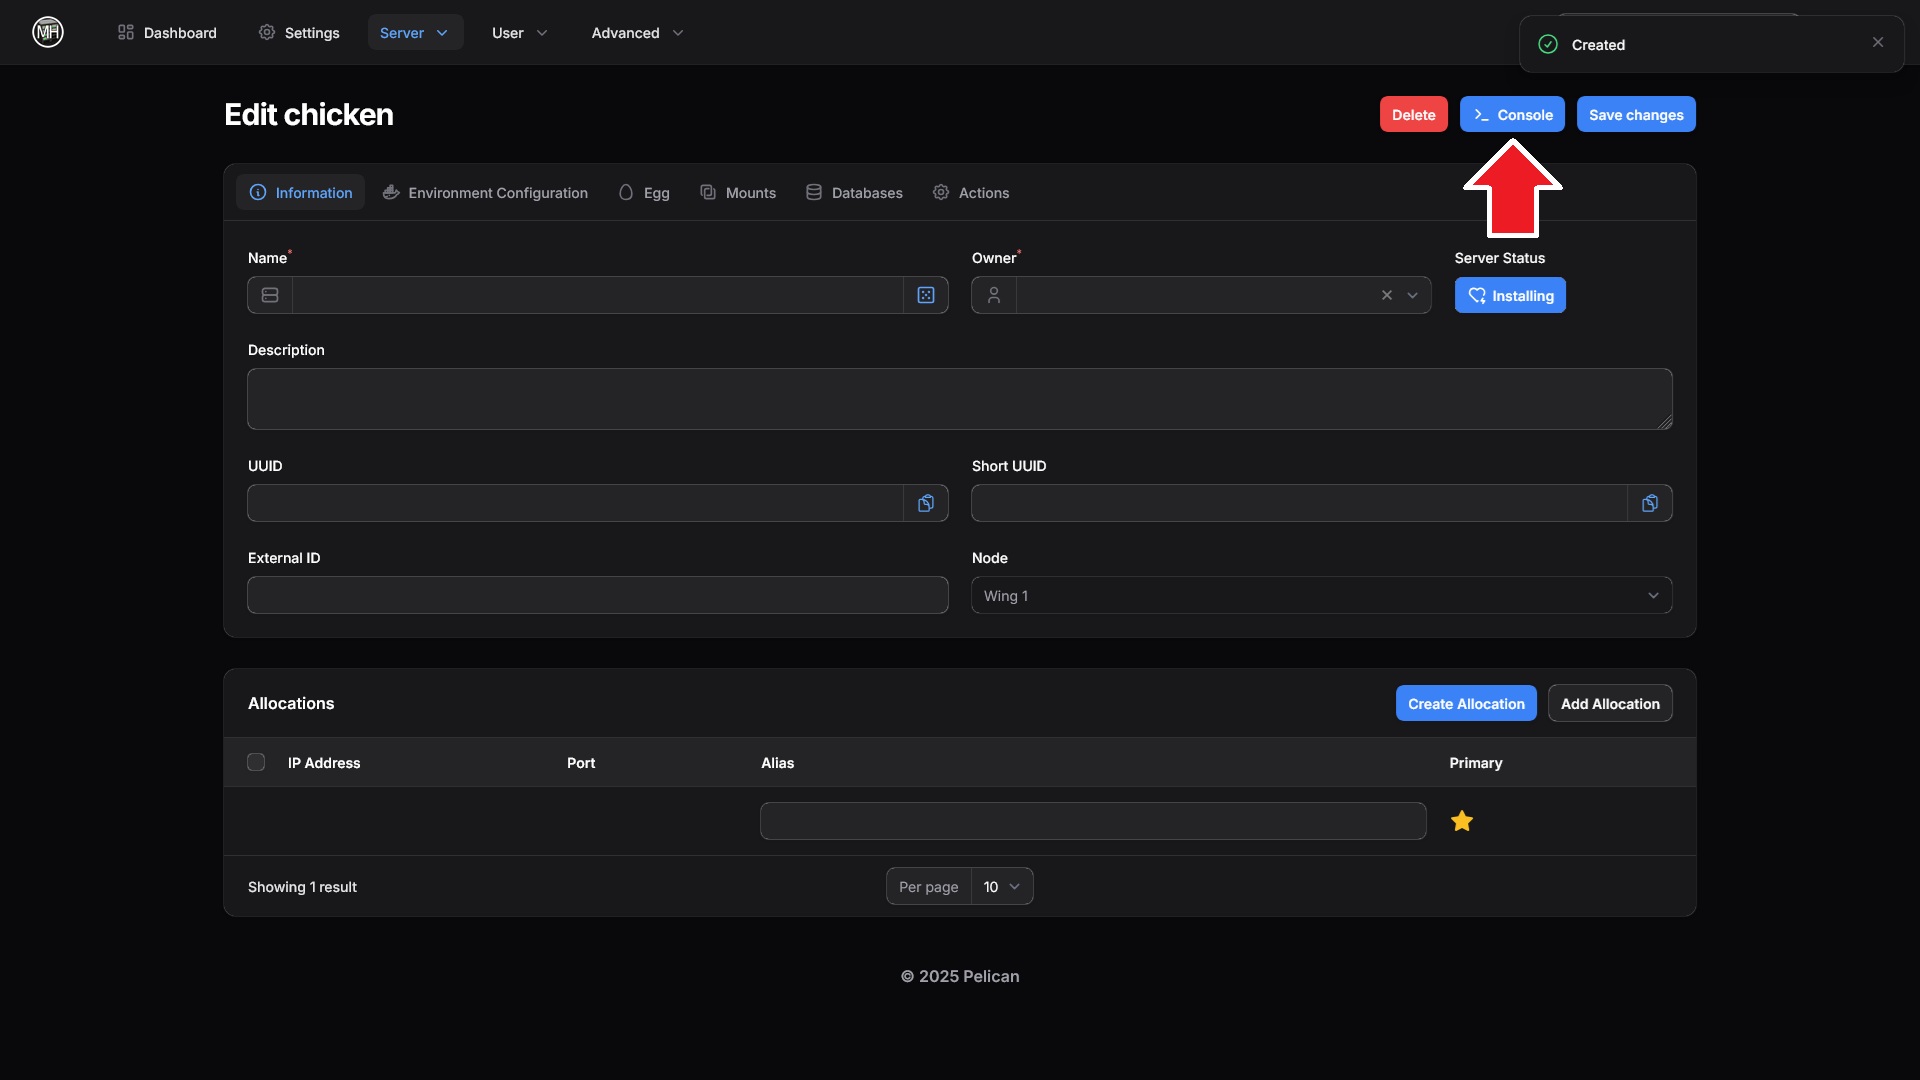
Once you've finished configuring the server environment, it's finally time to actually create your server! Go ahead and click the blue Create Server button near the bottom-right of the page. Once you do this, you will be redirected to your server's admin page. From here, click the Console button near the top-right.
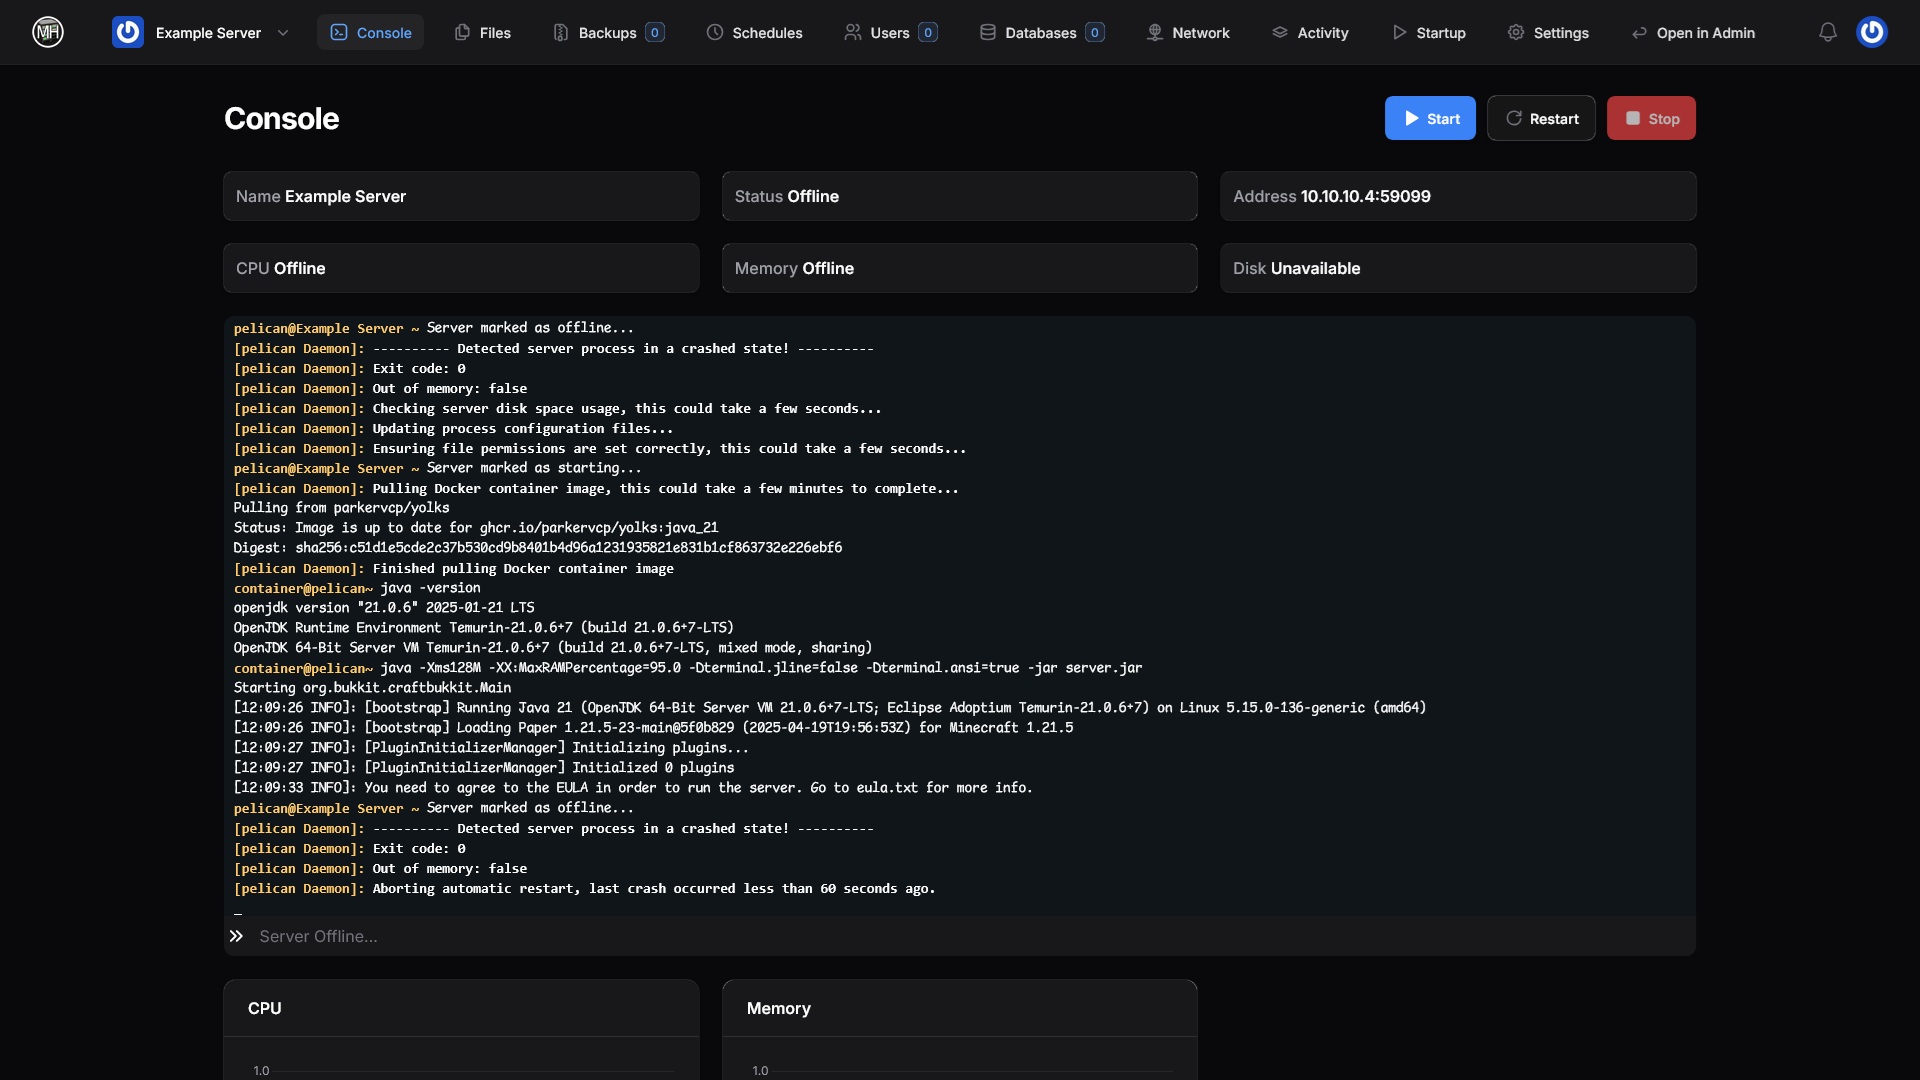
This will bring you to your server's console. From here, you can watch as the server installs:
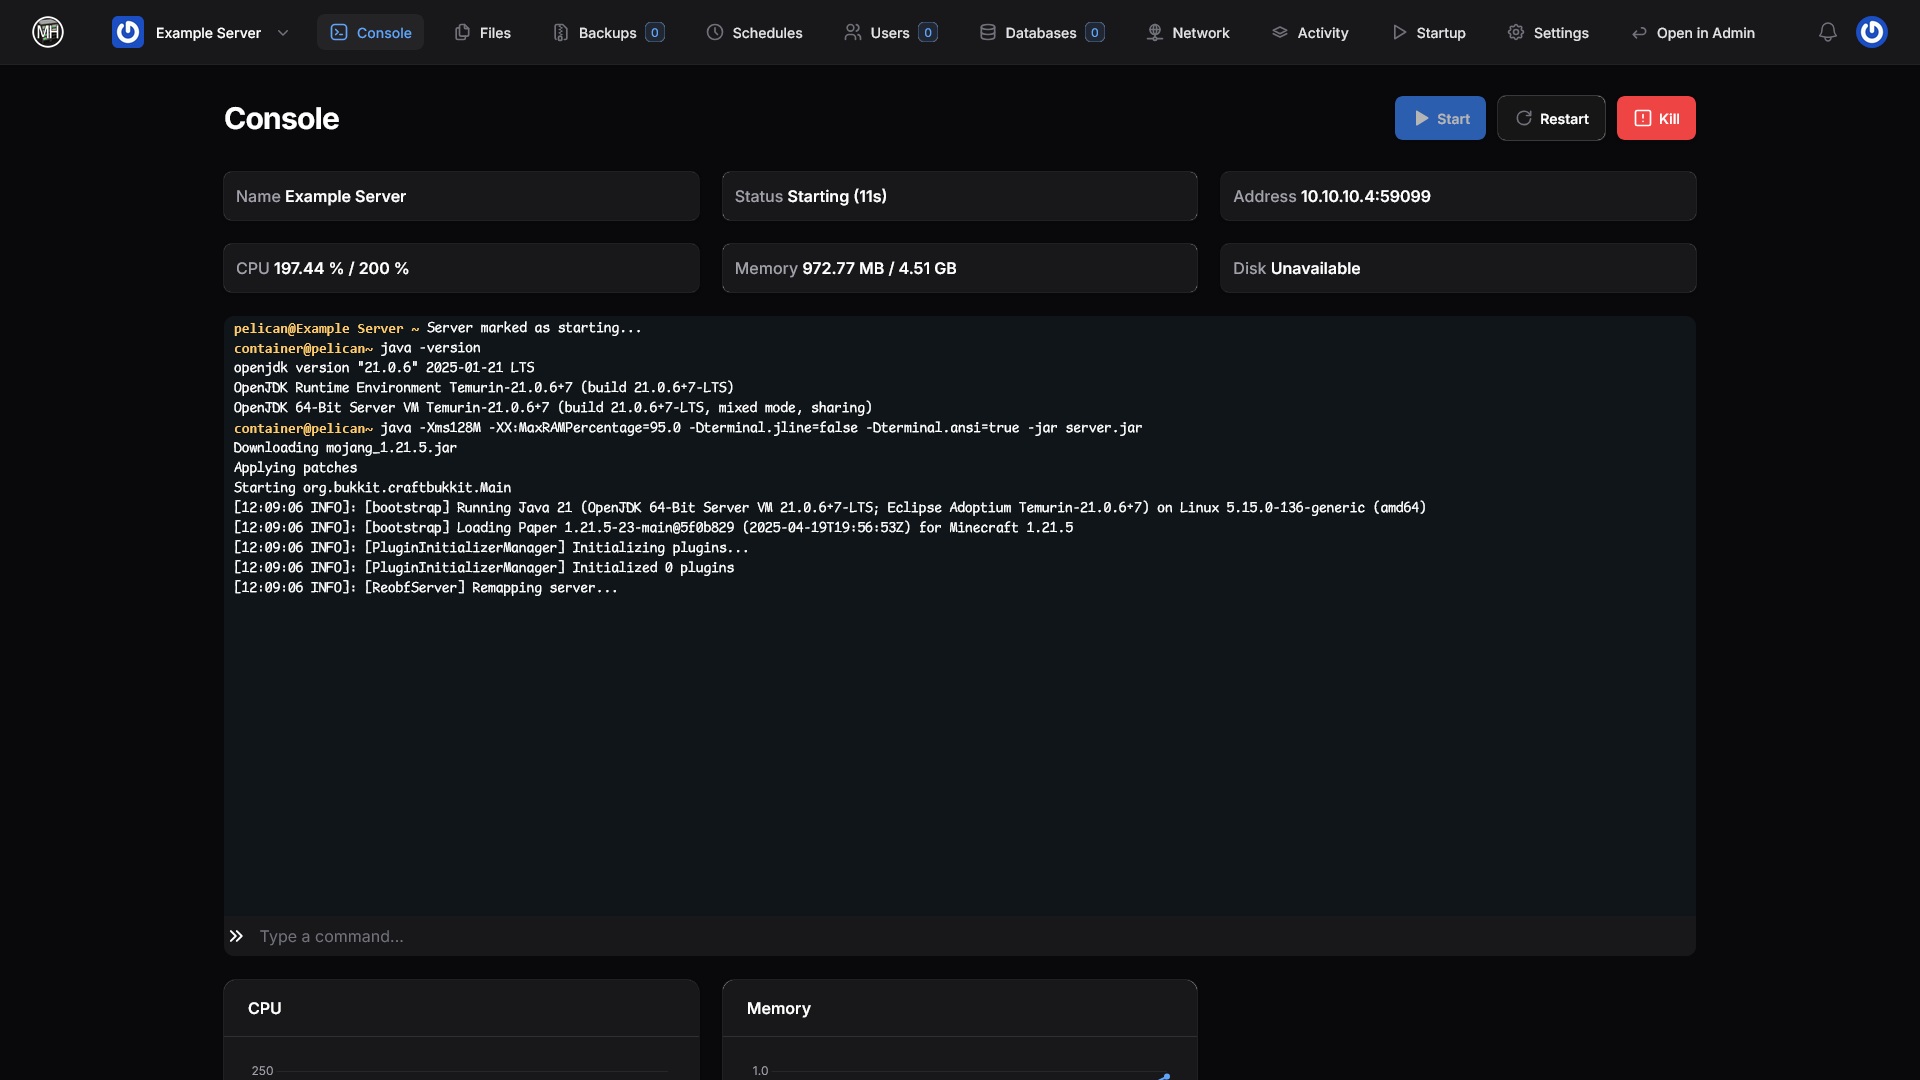
Depending on whether you changed the Start After Install setting on Step 5, the server will automatically start after installing. In the example below, a Minecraft server was created but it failed to start, but if you look closely you'll see that everything is actually okay. The only reason it failed is because we need to accept the EULA and this has to be done manually, so everything is actually working as it should. If you aren't already, get in the habit of reading information from the server's console to see what went wrong. In this case, the console is very easy to understand: "You need to agree to the EULA in order to run the server. Go to eula.txt for more info."
No Comments